TL;DR

Get garden gear delivered free — and shop member deals
- Fast, free delivery on millions of items
- Access to Prime Big Deal Days deals on October 6–7
- Prime Video, Amazon Music and more included
Sweet potatoes need warm soil, a long frost-free window, and well-drained soil. In Zone 9b, planting after frost and working around caliche ensures a good harvest, especially with proper tips for slips and soil management.
Plant slips only after soil warms to at least 65°F, ideally 70°F, and after the last frost.
Use raised beds or large containers to bypass caliche and improve drainage and root development.
Timing harvest before frost and cure roots properly to maximize sweetness and storage life.
Incorporate organic matter and chelated iron to combat high pH and nutrient deficiencies common in desert soils.
Start small with trial plantings of new cultivars to see what adapts best to your specific desert conditions.
Sweet Potatoes in Zone 9b: Slips, Timing & Caliche
Desert heat is an advantage when slips enter warm soil and storage roots have somewhere loose to expand. The winning strategy is simple: wait for warmth, plant above caliche, manage water carefully, and harvest before cold soil returns.
Soil near 70°F is even better for fast establishment.
Match the cultivar to the frost-free time remaining.
Raised beds, broad mounds and grow bags beat concrete-like soil.
Choose, revive and plant for fast establishment.
A slip is a young shoot grown from a mature sweet potato—not a chunk of seed potato. Roots form along buried stem nodes, so healthy shoots and careful planting matter more than a large initial root system.
Look for living tissue
Choose firm stems, fresh leaves and clean nodes. Reject blackened, mushy or badly wilted tissue that may carry rot.
Rehydrate with restraint
Place stressed lower stems briefly in water or moist growing mix. Remove them once revived; prolonged submersion can encourage stem rot.
Bury several nodes
Leave the growing tip and some leaves above ground. Water immediately and keep the root zone evenly moist during establishment.
Grow your own slips
Use a healthy, untreated root in warm moist media. Remove shoots when they reach 6–12 inches, then root them.
Reduce transplant shock
Plant in late afternoon. Temporary shade and wind protection help new slips survive intense sun, low humidity and drying winds.
Start disease-free
Certified slips or reputable seed roots are safer than grocery-store roots with unknown cultivars, treatments, pests or diseases.
Five gates between a slip and a full crop.
Zone 9b describes average winter minimums—not local frost dates, summer heat or soil temperature. Use conditions in your garden as the final authority.
Check frost
Wait until local frost danger has passed.
Measure soil
Confirm at least 65°F several inches deep.
Count days
Reserve 90–150 warm, frost-free days.
Plant gently
Set slips late in the day and water well.
Harvest early
Dig before frost or soil nears 55°F.
Warm soil starts the clock—not the calendar alone.
Spring planting commonly falls between March and May, but elevation, microclimate and frost patterns shift the window. In very hot deserts, spring is safer than exposing new slips immediately to peak-summer heat.
A practical Zone 9b spring window
Trial several varieties before scaling up.
Performance changes with heat, soil texture, season length and irrigation. Begin with a few plants of each cultivar, record results, and expand the types that produce well in your exact site.
| Variety | Known for | Season fit | Storage | Zone 9b trial role |
|---|---|---|---|---|
| Beauregard | Widely grown and productive | ✓ Relatively early | Good | Reliable baseline cultivar |
| Covington | Orange flesh and strong flavor | ~ Full warm window | Very good | Flavor and keeping-quality trial |
| Georgia Jet | Often chosen for shorter seasons | ✓ Fast-season option | Moderate | Useful where autumn cools earlier |
| Purple types | Distinct color and flavor | ~ Varies by cultivar | Varies | Small experimental planting first |
Do not fight the whole layer. Build a root zone above it.
Caliche is a cement-like calcium carbonate layer. It blocks expansion, distorts roots and impedes drainage. A designed growing zone is usually more effective than trying to break or remove caliche across an entire garden.
The barrier beneath the crop
Four practical bypasses
Feed the roots, not just the vines.
Loose structure and balanced fertility support storage-root growth. High pH commonly limits iron availability, while excessive nitrogen can create spectacular foliage with disappointing roots.
Add organic matter
Gradual compost additions improve aggregation, biological activity, moisture movement and the root zone above caliche.
Watch for iron chlorosis
Yellow leaves with green veins can indicate unavailable iron. Chelated iron such as EDDHA may be applied by soil drench or foliar treatment.
Keep nitrogen moderate
Too much nitrogen shifts energy into vigorous vines and away from storage roots. Test before adding phosphorus, sulfur or salty fertilizers.
Finish the crop without cracks, frost damage or bruising.
Keep new slips evenly moist, then transition to deep, measured irrigation. Avoid repeated saturation over caliche. As harvest approaches, handle roots gently—their thin skins are easily damaged when fresh.
Watering rhythm
Establishment: maintain consistent moisture while slips form roots.
Active growth: water deeply enough to wet the root zone, then allow air to return before irrigating again.
Late season: avoid sharp dry-to-wet swings that can encourage cracking.
The harvest threshold
Freshly dug roots are starchy and vulnerable. Cure them in warm, humid, well-ventilated conditions, then store them in a cooler location. Curing converts starches, improves sweetness and helps minor skin injuries seal.
How to Pick and Plant the Best Slips in Hot, Dry Zone 9b
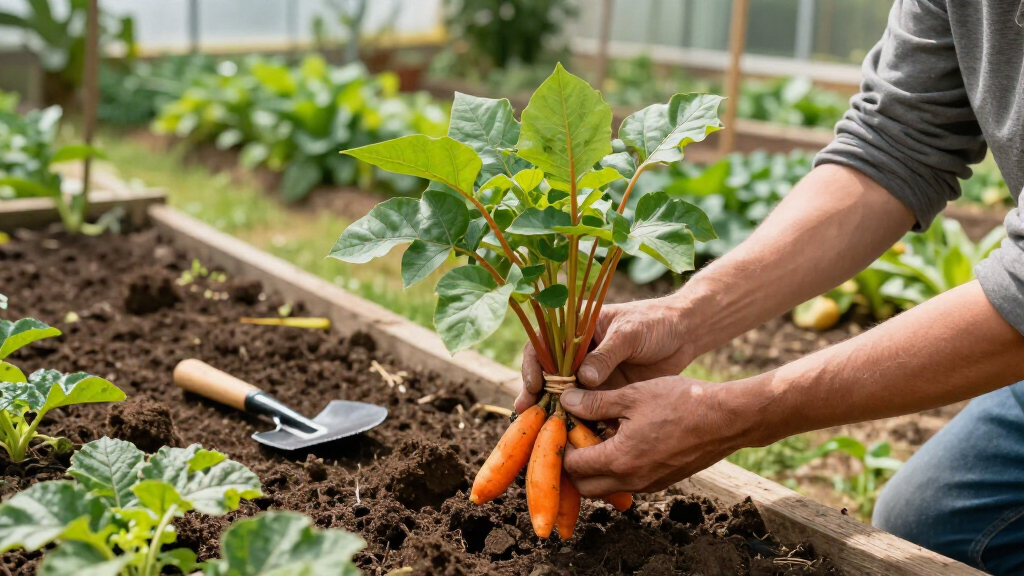
Sweet potato slips are your starting point. They’re rooted shoots grown from mature roots, ready to turn into a lush vine and, eventually, tasty tubers. Look for firm stems, fresh green leaves, and no mushy spots. If your slips arrive stressed, give them a quick drink of water or root them in moist soil until they perk up.
Growing your own slips is straightforward. Suspend a healthy sweet potato in water or plant it in moist soil. When shoots reach 6-12 inches, cut and root them. Space your slips 12–18 inches apart in loose, well-drained soil, with rows 3–4 feet apart. Bury several nodes, but keep the tips and some leaves above ground. Water immediately and keep the soil moist as they settle in.
In hot, windy zones, plant in late afternoon, and consider temporary shade to protect slips from shock. This simple step saves your effort and gets roots off to a strong start.
As an affiliate, we earn on qualifying purchases.
Timing Matters: When to Plant Sweet Potatoes in Zone 9b
Sweet potatoes in Zone 9b thrive when planted after the last frost and once soil hits at least 65°F—preferably 70°F. Use local frost date averages to guide you, which typically means planting from March to May. Check your soil temperature with a simple soil thermometer to avoid cold, stalled growth or rotting.
Plant too early, and your slips struggle in cold, wet soil. Cold soil hampers root development, making plants more susceptible to rot and disease, which can compromise your harvest. Conversely, planting too late shortens your growing window, risking incomplete tuber development before the first fall frost. In desert areas, early spring planting usually works best because it maximizes the long, warm growing season. If fall remains warm, a second planting might be possible, but it’s less predictable due to unpredictable temperature drops.
Keep an eye on local weather — a sudden cold snap can ruin young plants. Timing your planting for when temps are stable and soil is warm sets your roots up for success, ensuring vigorous growth and a healthy harvest.
raised garden beds for root vegetables
As an affiliate, we earn on qualifying purchases.
As an affiliate, we earn on qualifying purchases.
Varieties That Thrive in the Desert: Picking the Right Sweet Potato
Not all sweet potato varieties are equal in Zone 9b’s desert heat. Some mature faster, resist pests better, or produce sweeter roots. The most common choices include ‘Beauregard’, which is early and productive, and ‘Covington’, known for flavor and storage. ‘Georgia Jet’ adapts well to shorter seasons, and purple-fleshed types add a splash of color.
Always use certified slips or healthy roots from trusted sources. Grocery store roots often carry unknown varieties, pests, or diseases, making them a risky start. Using certified slips ensures you start with healthy, disease-free plants tailored for your growing conditions, reducing the risk of crop failure and pest issues.
Pick varieties suited for your timing, soil, and taste preferences. Experimenting with a few types can help you find what works best in your yard, but always prioritize those proven to perform in hot, dry, and variable desert conditions for the best results.
As an affiliate, we earn on qualifying purchases.
Caliche: Why It’s a Big Deal and How to Work Around It
Caliche is a cement-like calcium carbonate layer that’s common in desert soils. It’s like trying to grow in concrete — roots can’t break through easily, and roots tend to fork, stay tiny, or grow crooked. Digging for roots gets tough, and drainage suffers. This layer can severely limit root expansion, resulting in misshapen, stunted tubers, or roots that remain small and fibrous. It also causes water to pool above it, leading to rot and poor growth conditions, which can reduce yields and crop quality.
Deep planting in native caliche often results in misshapen roots or roots that can’t expand fully. Plus, water pools above the layer, leading to rot or poor growth. The presence of caliche means that traditional planting methods may not be effective, and attempting to break through or remove it can be labor-intensive and damaging to your soil structure.
So, what’s the fix? Instead of fighting caliche, build your garden beds above it. Raise beds 10–18 inches high with a loose, well-drained mix, combining native soil, compost, and sand. For limited space, create broad, loose mounds or ridges. Large containers or grow bags are also excellent options, keeping roots in soft, controlled soil away from the caliche. These methods effectively bypass the caliche layer, allowing roots to grow freely and develop properly.
When digging is necessary, test water drainage in the hole—if water stands, the caliche is too thick to work around. Avoid trying to break up the entire layer; focus on creating a loose, deep zone for roots to grow in. This approach minimizes effort and maximizes root development, leading to healthier, more uniform tubers.
Understanding caliche is crucial because it directly impacts how you plan your garden. It’s not just a physical barrier; it influences water movement, root health, and ultimately your crop yield. By designing your planting strategy around this layer, you can turn a challenging soil condition into an advantage, creating a thriving sweet potato crop despite the desert’s harsh conditions.
As an affiliate, we earn on qualifying purchases.
Building Soil and Fixing pH: Tips for Fertile, Alkaline Desert Soil
Sweet potatoes love moderately fertile, well-drained soil. In Zone 9b’s alkaline soils, iron deficiency is common, showing up as yellowing leaves with green veins. Use chelated iron—like EDDHA—applied as a foliar spray or soil drench for quick fixes.
Adding compost and organic matter improves soil structure and biological activity, which helps roots develop better even over caliche. Be cautious with nitrogen—excess boosts vines but reduces root size. Incorporate organic amendments gradually, allowing beneficial microbes to improve soil health and nutrient availability over time. Improving soil structure and fertility reduces the negative effects of high pH and calcium carbonate, promoting healthier, larger roots.
Test your soil’s pH and nutrient levels regularly. Avoid over-fertilizing with phosphorus or salts, which can cause problems like root deformities or soil salinity. Adjusting soil pH with sulfur is slow and best done after a soil test confirms high pH and calcium carbonate presence. Regular testing helps you make informed amendments, ensuring optimal conditions for tuber development and overall plant health.
Keeping Roots Happy: Watering and Harvesting in Desert Heat
Consistent moisture is key, especially early on. In Zone 9b’s heat, water deeply but infrequently to prevent cracking and promote even growth. Drip or soaker hoses work well, delivering moisture directly to the root zone and reducing evaporation. Proper watering practices help establish a strong root system, which is crucial in arid environments where water stress can cause roots to become fibrous or deformed.
As roots mature, cut back on watering to avoid rotting. Check moisture below the surface—dry topsoil doesn’t mean roots are dry below. Overwatering can lead to rot, especially in high temperatures, so balance is essential.
Harvest before first fall frost, or when soil temp dips below 55°F. Use a broadfork or digging fork gently to lift roots, avoiding bruises. Dug roots are fragile; handle with care to prevent damage. Proper timing and gentle handling ensure your sweet potatoes retain maximum flavor and storage quality.
Timing is everything. Dig too early, and roots are small or watery. Too late, and frost can ruin your harvest or cause rot. Plan accordingly, especially in desert zones where soil cools quickly, and be prepared to harvest promptly to preserve quality.
Curing and Storage: Making Your Sweet Potatoes Last
After harvest, curing is essential. Keep roots at about 80–85°F with high humidity (85-90%) for 5–10 days. This heals minor wounds and turns starches into sugars, boosting sweetness. Proper curing enhances flavor, improves storage life, and reduces the risk of rot or disease during long-term storage.
For home, mimic curing by placing roots in a warm, ventilated space with a little humidity—like a heated garage or enclosed porch. Avoid sealing roots in plastic, which traps moisture and causes rot. Ensuring good airflow during curing is crucial to prevent mold and decay.
Once cured, store roots in a cool, dark place at 55–60°F. Proper storage keeps them tasty for months. Don’t refrigerate; cold damages the roots, causing chilling injury. Regularly check stored roots for spoilage and remove any damaged ones promptly to maintain overall quality.
Use damaged or cut roots first, and brush off excess soil after drying. Proper curing and storage turn your garden’s bounty into winter staples, allowing you to enjoy sweet potatoes long after harvest.
Smart Practices and New Ideas for Growing Sweet Potatoes in Desert Soil
New breeding efforts focus on early-maturing, drought-resistant, and pest-tolerant cultivars tailored for arid zones. Many growers now use virus-free, tissue-cultured slips for cleaner starts and better vigor.
Raised beds, containers, and drip irrigation are game changers in caliche-heavy soils. Cover crops, compost, and reduced tillage improve soil over time, easing future planting efforts. Reflective mulches and shade cloths help manage desert heat during transplanting and early growth.
Start small with trial plots before investing heavily. Any cultivar’s performance depends heavily on local conditions—soil, pests, water, and climate all matter. Testing different approaches allows you to adapt best practices for your specific garden environment, gradually building a resilient and productive system.
Frequently Asked Questions
Can sweet potatoes really thrive in desert soils?
Yes. With proper timing, soil amendments, and caliche workarounds like raised beds or containers, sweet potatoes can flourish in Zone 9b’s harsh desert environment.When is the best time to plant slips in Zone 9b?
Plant after the last frost when soil temperatures stay above 65°F—usually March to May. Use a soil thermometer to be sure, especially in variable desert climates.Are grocery store sweet potatoes good for planting?
They can sprout slips, but their variety, disease status, and adaptability are uncertain. For reliable results, use certified slips or roots from trusted growers.How deep should I plant my slips?
Bury several inches of stem, covering multiple nodes, but keep the growing tip and leaves above ground. This encourages strong root development without suffocating the plant.How do I fix caliche soil for sweet potatoes?
Build raised beds or large containers with loose, well-drained soil above the caliche. Avoid trying to break up the caliche layer—focus on creating a deep, soft zone for roots to grow.Conclusion
Growing sweet potatoes in Zone 9b isn’t just possible — it’s rewarding, even with caliche and desert heat. Focus on planting at the right time, building loose, deep soil zones, and curing roots carefully. Your next harvest could be the sweetest yet, thriving in the toughest soils if you give them the right start.Fall yard work Picks
leaf blowers
As an affiliate, we earn on qualifying purchases.