
TL;DR

Get garden gear delivered free with Prime
- Fast, free delivery on millions of items
- Prime Video, Amazon Music and more included
- Member-only deals all year
Converting spray heads to drip reduces water waste by up to 50%, especially after turf removal. With proper planning and installation, you can create a targeted, low-maintenance watering system that saves water and promotes healthier plants.
Imagine reclaiming the water you waste every time a spray head overshoots or drips onto pavement. After removing turf, those spray heads often become unnecessary or even counterproductive. Instead, switching to drip irrigation offers a quiet, water-wise way to nourish your plants directly at their roots, saving both water and money.
In this guide, you’ll learn how to convert those old spray heads into efficient drip lines, what tools and materials you’ll need, and tips to make the process smooth and successful. Whether you’re a seasoned gardener or a DIY newbie, mastering this conversion can transform your landscape watering into a more precise, eco-friendly routine.
Converting spray heads to drip after turf removal saves up to 50% of water used for irrigation.
Planning your layout and choosing the right emitters is key to even, healthy watering.
Regular maintenance and system checks prevent clogs and ensure long-term reliability.
Smart controllers and self-flushing emitters make ongoing system management easier and more efficient.
DIY conversion is doable with basic tools, but careful planning and testing are essential.
From Lawn Spray to Root-Level Drip
After turf removal, old spray heads often water pavement, bare soil, and weeds. Converting them to drip creates a targeted, low-maintenance irrigation system that delivers moisture where plants can actually use it: at the roots.
Depending on landscape design, plant mix, and installation quality.
For a modest converted zone with accessible spray-head risers.
Slow, precise delivery limits overspray, runoff, and evaporation.
Adjust to plant spacing, soil, and emitter flow.
Flower beds, vegetables, and shrub borders.
Protect emitters and stabilize operating pressure.
Careful planning and testing matter most.
A smarter fit after turf
Spray irrigation is designed to cover a broad, continuous lawn. Once that lawn is gone, the same coverage pattern becomes inefficient—and can weaken new planting through runoff, overwatering, and uneven distribution.
Stop watering empty space
Emitters place water near individual plants, reducing losses to wind, pavement, and runoff.
Build healthier roots
Measured delivery helps limit fungal disease, root rot, nutrient leaching, and weed growth between plants.
Match water to need
Flow rates and emitter placement can reflect plant size, sun exposure, soil drainage, and seasonal demand.
A homeowner who converted former turf irrigation to drip cut water use by nearly 40% while keeping flower beds healthy through the hottest months.
Five steps from spray to drip
The physical work is straightforward. The quality of the result depends on assessing the landscape first, regulating pressure, and testing every branch before covering or burying tubing.
Shut down
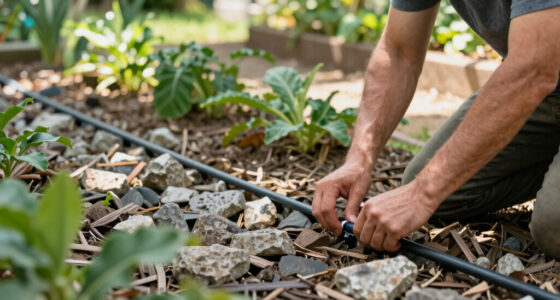
Turn off irrigation. Carefully remove spray heads without damaging risers or fittings.
Map needs
Group plants by water demand, spacing, sun exposure, and soil conditions.
Convert zone
Add the adapter, filter, and pressure regulator before connecting main tubing.
Place emitters
Run tubing with minimal bends, stake it securely, and position emitters near roots.
Test + tune
Flush lines, check leaks, cap ends, and adjust flow until moisture is even.
Spray heads vs. drip
Neither method is universal. Spray remains useful for continuous turf and some overhead-watering needs; drip is usually the better match for discrete plants after lawn removal.
| Feature | Spray heads | Drip irrigation |
|---|---|---|
| Water delivery | ~ Broad overhead spray | ✓ Directly at roots |
| Waste exposure | ✗ Wind, runoff, overspray | ✓ Low when well designed |
| Best landscape | ~ Lawns and broad turf | ✓ Beds, rows, and shrubs |
| Installation | ✓ Quick and simple | ~ Moderate planning needed |
| Maintenance | ~ Nozzle and aim checks | ~ Flushing and clog checks |
| Plant-level control | ✗ Limited precision | ✓ Adjustable by emitter |
Relative irrigation use
Illustrative maximum reduction based on reported 30–50% savings.
Where drip fits best
Prioritize zones with discrete, rootable planting locations.
Materials that make it reliable
Quality fittings, filtration, and pressure regulation reduce leaks and clogging. Saving on these small components can create uneven watering and repeated repairs later.
Maintain, adapt, automate
Drip is efficient because its outlets are small and precise—the same reason periodic inspection matters. A simple maintenance rhythm keeps that precision intact.
Walk the zone
Look for leaks, displaced tubing, dry plants, pooling water, and clogged emitters.
Flush the lines
Open line ends to clear sediment, then clean filters and inspect connections.
Retune the flow
Adjust schedules and emitter output as weather, plant size, and root zones change.
Before you start
Conversion kits and adjustable emitters have made DIY installation more accessible, but the fundamentals remain the same: match the system to the landscape and test it carefully.
Can I convert an existing zone myself?
Yes. Many homeowners can complete a modest conversion with basic plumbing skills, common tools, and a compatible conversion adapter.
When is the best time?
Immediately after turf removal or during active growth, when new plants need targeted and observable watering.
How do I keep distribution even?
Use appropriate emitter spacing, pressure regulation, short and logical tubing runs, and a full-system test.
When might drip not be suitable?
Large turf areas, some very large trees, and plants requiring overhead watering may need another irrigation method.
Convert thoughtfully, not mechanically. Map plant needs, install filtration and pressure control, test every run, and maintain the system. Done well, the result can use up to 50% less irrigation water while supporting healthier plants.
Why Converting Spray Heads to Drip Makes Your Garden Smarter
After turf removal, spray heads often spray water onto paths, driveways, or dry patches instead of your plants. Switching to drip irrigation focuses water directly where your plants need it—at the roots. This not only reduces water waste but also cuts down on runoff and overwatering, which can drown delicate plants or encourage weeds.
Understanding this shift is crucial because it reflects a move toward more sustainable gardening practices. Overwatering can lead to root rot, fungal diseases, and nutrient leaching, which weaken plants over time. Drip irrigation minimizes these risks by delivering precise amounts of water, promoting healthier root systems. However, tradeoffs include the need for regular maintenance to prevent clogging and initial investment in equipment. Recognizing these factors helps you weigh the long-term benefits against the upfront effort, ensuring your system remains efficient and reliable.
For example, a homeowner in Phoenix noticed a spike in water bills after turf removal. When they converted spray heads to drip, they cut their water use by nearly 40%, and their flower beds stayed lush even during the hottest months. Drip irrigation is a game-changer for desert gardens, especially when water conservation is a priority.
As an affiliate, we earn on qualifying purchases.
Step-by-Step: How to Convert Spray Heads to Drip in Your Yard
- Turn off your irrigation system and carefully remove the existing spray heads from their risers, ensuring you don’t damage the fittings. This step prevents water waste and prepares your system for accurate conversion.
- Assess your landscape—identify zones that need targeted watering and plan where the drip lines will run. Consider plant types, spacing, and sun exposure to determine emitter placement and flow rates. Proper planning here is essential because it influences water efficiency and plant health; poorly planned layouts can lead to dry patches or overwatering, which stress plants and waste water.
- Lay out your drip tubing from existing valves or install new zones if needed. Use a layout that minimizes bends and ensures even coverage. The way you plan your layout impacts water distribution uniformity and maintenance ease; convoluted or overly complex setups can cause pressure issues or make repairs more difficult.
- Attach emitters at intervals tailored to plant needs—generally 12-24 inches apart. Choosing the right emitter spacing and flow rate is critical because it directly influences how evenly water reaches each plant. Too close, and you risk overwatering; too far apart, and some plants may not receive enough moisture.
- Connect the tubing, secure it with stakes to prevent movement, and install filters and pressure regulators to maintain consistent flow. These components help prevent clogging and ensure that water pressure remains stable, which is vital for even watering and system longevity.
- Turn the system back on, check for leaks, and adjust emitter flow rates for even watering. Testing allows you to identify and fix issues early, avoiding dry spots or water wastage. Proper adjustment ensures your plants receive consistent moisture, promoting healthy growth and resource efficiency.
For instance, a gardener replacing turf in a vegetable garden might run ¼-inch tubing along rows, placing emitters at each plant. Testing and adjusting ensures each plant gets just enough water without runoff. This careful setup enhances plant health and conserves water, illustrating the importance of detailed planning and execution in the conversion process.
adjustable drip emitters for garden
As an affiliate, we earn on qualifying purchases.
As an affiliate, we earn on qualifying purchases.
Comparison: Spray Heads vs. Drip Irrigation — Which Fits Your Landscape?
| Feature | Spray Heads | Drip Irrigation |
|---|---|---|
| Water Delivery | Sprays water over wide area | Directly to roots via emitters |
| Water Waste | High—up to 50% lost to runoff or wind | Low—minimizes waste |
| Suitability | Lawns, large turf areas | Flower beds, vegetable gardens, shrub borders |
| Installation Ease | Quick, simple | Requires careful planning, moderate skill |
| Maintenance | Check for clogs, occasional adjustments | Regular flushing, emitter checks |
garden hose drip irrigation converter
As an affiliate, we earn on qualifying purchases.
As an affiliate, we earn on qualifying purchases.
Materials and Tools You Need to Make the Switch
- Drip tubing (main lines and emitter lines)
- Connectors, elbows, and fittings
- Pressure regulators and filters
- End caps and stakes
- Tools: trenching shovel, scissors, fittings tool
Choosing the right materials impacts the efficiency and longevity of your system. High-quality fittings reduce leaks and clogging, which are common issues in drip systems. Using appropriate pressure regulators ensures water flows at optimal rates, preventing over- or under-watering. Inadequate materials or poor installation can lead to frequent repairs, wasted water, and uneven plant growth. Investing in good components upfront saves time and money later, providing a more reliable and effective irrigation setup.
As an affiliate, we earn on qualifying purchases.
Maintaining Your New Drip System for Long-Term Success
Once installed, your drip system needs consistent attention to keep it functioning optimally. Regularly check emitters for clogging—salt buildup, mineral deposits, and debris can significantly reduce flow. Flushing the lines every few months prevents buildup and ensures water reaches all emitters evenly. Neglecting maintenance can lead to dry patches, overwatering, or system failure, which defeats the purpose of efficient watering.
Adjust flow rates as plants grow or seasons change, because different stages of plant development require different moisture levels. For example, a shrub that doubles in size might need a slight increase in emitter output or additional emitters to keep roots moist without overwatering. Incorporating routine maintenance, like cleaning filters and inspecting fittings, extends system lifespan and prevents costly repairs. This proactive approach supports healthy plants and conserves water over the long term.
Adding a filter helps prevent clogs, especially in areas with hard water or mineral-rich soil. Regular flushing and component checks are essential because they address common issues before they escalate, ensuring your system remains efficient and reliable for years to come.
Latest Tech and Trends Making Conversion Easier
New tech makes switching to drip even simpler. Smart controllers adapt watering schedules based on weather data and soil moisture sensors, cutting water waste further. Some systems now include self-flushing emitters, reducing clogging issues and maintenance time. These innovations allow for more precise control, helping you optimize water use without manual intervention. Additionally, eco-friendly materials, like recycled tubing, are emerging, reducing environmental impact and supporting sustainable gardening practices. Many manufacturers now offer comprehensive conversion kits with all necessary components, simplifying DIY projects and ensuring compatibility and quality. Staying informed about these trends can help you choose the most efficient and environmentally responsible options, making your conversion process smoother and more effective.
Frequently Asked Questions
When is the best time to convert spray heads to drip irrigation?
The best time is during or immediately after turf removal, ideally in early spring or late summer when plants are actively growing and can adapt to new watering patterns.
Can I convert existing sprinkler zones to drip myself?
Absolutely. With basic plumbing skills, some patience, and the right tools, most homeowners can perform the conversion without professional help, saving money and customizing the system to their landscape.
What are the costs involved in converting to drip irrigation?
Costs vary based on system size, materials, and whether you hire help. DIY projects can start around $50 for small zones, while larger or complex systems might reach a few hundred dollars. Investing in quality parts reduces future repairs.
How can I ensure even water distribution with drip emitters?
Spacing emitters evenly along your tubing, installing pressure regulators, and testing the system thoroughly helps deliver consistent moisture to all plants, preventing dry patches or overwatering.
Are there situations where drip isn’t suitable?
Yes. Large trees or areas needing overhead watering might still benefit from spray heads or sprinklers, as drip is best for targeted watering rather than broad coverage.
Conclusion
Switching from spray heads to drip irrigation after turf removal isn’t just about saving water — it’s about giving your plants a spa day every day. With a little planning, some tools, and a dash of patience, you can turn your landscape into a lush, water-efficient paradise.
Think of it as giving your garden a targeted shot of hydration, exactly where it needs it most. Your plants will thank you, and your water bill will thank you even more.
Halloween Picks
halloween
As an affiliate, we earn on qualifying purchases.