
TL;DR

Get garden gear delivered free with Prime
- Fast, free delivery on millions of items
- Prime Video, Amazon Music and more included
- Member-only deals all year
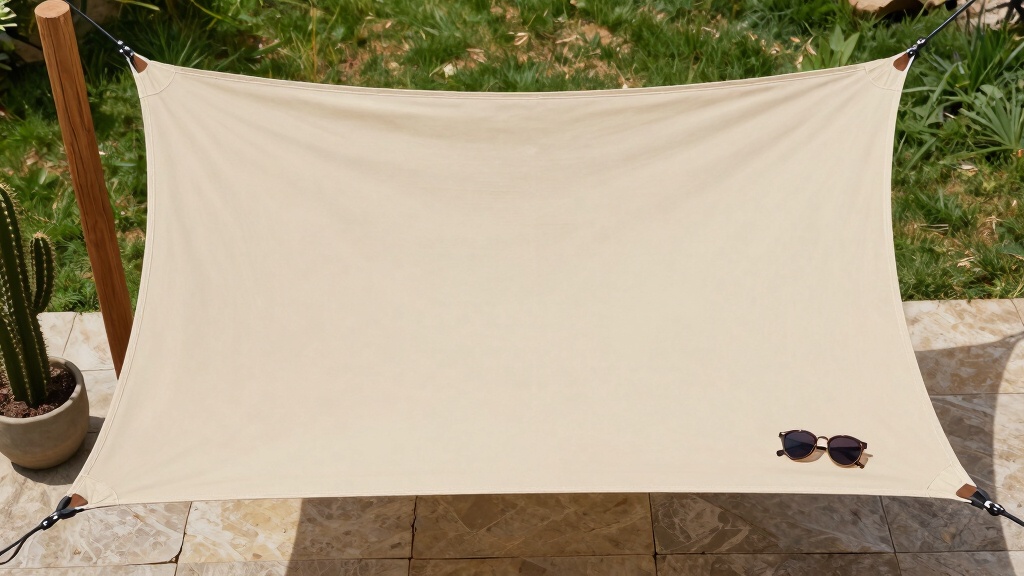
Orienting a shade sail correctly involves understanding the sun’s path, installing at the right angle and height, and choosing durable, UV-resistant fabrics. This ensures maximum shade during Arizona’s hottest hours—especially from 1 to 4 PM.
If you’re tired of the scorching Arizona afternoon sun turning your patio into an oven, you’re not alone. The secret to staying cool isn’t just about the shade sail itself, but **how you orient it**. A well-placed sail can cut the heat, keep your furniture from fading, and turn your outdoor space into a true oasis. In this guide, you’ll learn exactly how to position your shade sail for maximum relief during the hottest part of the day.
Arizona’s sun is relentless—peaking from late spring to early fall, it bathes your backyard in blinding rays. But with some simple tricks, you can make your shade work smarter, not harder. Whether you’re installing a new sail or adjusting an existing one, understanding the sun’s path and choosing the right angle makes all the difference.
Orient your shade sail east-west for south-facing patios to block afternoon rays more effectively.
Install the sail 8-12 feet high with a tilt of 20°-30° during summer to intercept the sun’s highest angles.
Use sun path charts specific to Arizona to fine-tune your sail’s position seasonally.
Choose durable, UV-resistant fabrics with UPF 50+ for long-lasting protection against the harsh sun.
Regularly inspect tension, anchors, and fabric to keep your shade sail performing year-round.
How to Orient a Shade Sail for Arizona’s Afternoon Sun
The sail matters—but its position matters more. Aim coverage at the southwestern sky, tune the height and tilt, and your patio can intercept the harshest rays before they reach people, paving, and furniture.
Prioritize the hours when southwest exposure is most punishing.
Use a purposeful tilt instead of installing the sail completely flat.
Strategic interception can sharply reduce direct solar load.
Design for where the sun will be—not where it is now.
Arizona’s summer afternoon sun moves through the southwest. A sail that looks perfectly placed at noon may leave the seating area exposed by 3 PM, so map the moving shadow before selecting anchors.
Mark the shadow at peak heat
Check the patio near 1 PM, 2:30 PM, and 4 PM. Mark where direct light reaches the floor, furniture, and doors.
Run the sail east–west
For many south-facing patios, this broad axis gives the sail more useful surface area against southwest afternoon rays.
Lower the western edge
A lower southwest or west-side anchor helps catch angled sunlight that would otherwise slip beneath a flat, high canopy.
From sun path to usable shade
Each decision changes the next. Start with actual sun behavior, then translate it into orientation, anchor geometry, tension, and seasonal performance.
Focus on the 1–4 PM arc.
Test east–west coverage first.
Create a controlled 20°–30° tilt.
Remove sag and reduce flapping.
Recheck at 1, 2:30, and 4 PM.
Height, tilt, and tension work as one system.
Too low can obstruct movement and views. Too high lets angled rays pass underneath. The practical target is a tensioned, twisted plane that shades the occupied zone while preserving ventilation.
The summer shield
Use staggered anchor heights to form a deliberate plane rather than a flat roof.
Recommended operating range
Use these targets as a starting point, then confirm against the site’s sun path, wind exposure, structures, and anchor capacity.
Sharpen the tilt for summer interception. A slightly flatter winter setting can match the lower seasonal sun while preserving useful daylight.
| Configuration | Afternoon interception | Airflow | Seasonal flexibility | Best use |
|---|---|---|---|---|
| East–west + tilted | ✓Strong | ✓Good | ~Moderate | South-facing Arizona patios |
| Flat, high installation | ✗Weak at edges | ✓High | ✗Low | Midday-only overhead shade |
| North–south + tilted | ~Site dependent | ✓Good | ~Moderate | Narrow or side-exposed spaces |
| Adjustable / retractable | ✓Strong | ✓Variable | ✓High | Seasonal control and wind response |
The right orientation still needs the right fabric and anchors.
High UV exposure, heat, and gusts punish weak materials. Specify a breathable architectural shade fabric, sound structural anchors, and enough adjustment to restore tension over time.
UPF 50+ protection
Choose UV-resistant shade cloth designed for prolonged outdoor exposure. Breathable fabric lets hot air escape instead of trapping it below.
Wind-rated anchors
Posts, walls, hardware, and foundations must handle tension and local wind loads. Large or complex installations warrant professional design.
A taut, twisted plane
Proper tension preserves shape, limits flapping, sheds debris, and keeps the intended shade footprint from shrinking through sag.
Before you tighten the first turnbuckle
Small site differences can change the ideal setup. Use local sun-path data and verify the actual shadow at the hours when you plan to use the space.
When is the best time to install?
Late spring or early summer makes it easier to observe the highest, most intense afternoon sun and tune the sail for peak-season relief.
How do I find my exact orientation?
Use a sun-path chart or online solar-position tool for your Arizona location, then confirm the predicted path with on-site observations.
Can this be a DIY project?
Small installations may be manageable with the correct tools and structural knowledge. Use a professional for large spans, difficult anchors, or exposed sites.
Will one setup work all year?
It can, but adjustable hardware improves results. The winter sun sits lower, so modest seasonal changes can keep the shade footprint useful.
Face the problem southwest, run the sail east–west where appropriate, mount it 8–12 feet high, and create a 20°–30° tilt. Pair that geometry with UPF 50+ fabric, strong anchors, reliable tension, and seasonal checks.
Why Arizona’s Afternoon Sun Is a Different Beast (And How to Beat It)
Arizona’s afternoon sun is fierce, especially between 1 PM and 4 PM. It’s coming from the southwest, hitting your patio at a steep angle that can turn a simple shade sail into a weak barrier. This intense sunlight can cause your shade to be less effective if not properly oriented, leading to inadequate shading and continued heat gain. Understanding the sun’s “journey” across the sky isn’t just academic; it directly impacts how well your shade sail performs. If the sail isn’t aligned with the sun’s path, you risk leaving gaps that let in blinding rays and heat, defeating the purpose of shading. Proper orientation maximizes the sail’s ability to intercept and block these rays before they reach your seating area, which can significantly lower the temperature and improve comfort. This strategic placement also reduces the need for larger or more expensive sails because you’re optimizing what you already have. The tradeoff is that improper orientation can render your investment less effective, so understanding this dynamic is crucial for long-term outdoor comfort.
As an affiliate, we earn on qualifying purchases.
How to Choose the Best Orientation for Your Shade Sail in Arizona
Here’s a simple step-by-step to orient your shade sail for maximum afternoon relief, but understanding the reasoning behind each step helps you make smarter choices. Knowing your patio’s layout and observing the sun’s path allows you to anticipate how the sun moves throughout the year, which is essential because Arizona’s high summer sun can shift the optimal shading angle. For example, an east-west orientation during summer can maximize coverage during peak heat, but in winter, the lower sun angle might require a different approach. Deciding on the primary direction involves balancing the sail’s ability to block the sun while maintaining aesthetic appeal and airflow. Installing the sail at the right height — typically 8-12 feet — ensures it provides effective shade without obstructing views or airflow, which is vital in Arizona’s hot, dry climate. Slight seasonal adjustments, like tilting the sail, can significantly improve its effectiveness during different times of the year, helping you avoid the tradeoff between maximum shade and ventilation. Using online sun charts specific to Arizona can reveal that during summer, the sun hits at an angle of about 70° from the horizon in the late afternoon. Positioning your sail to intercept these rays isn’t just about blocking sunlight; it’s about optimizing comfort, reducing heat gain, and making your outdoor space more livable during Arizona’s most intense months.
As an affiliate, we earn on qualifying purchases.
The Perfect Height and Angle—Getting It Just Right
Installing your shade sail at the right height and angle isn’t just about coverage; it’s about balancing effectiveness with practicality. Too low, and the sail may sag or obstruct visibility, creating an unsightly or unsafe environment. Too high, and it might fail to shade effectively, leaving your outdoor space exposed to the sun’s relentless rays. Most experts recommend mounting the sail between 8 and 12 feet high because this height provides sufficient shade while maintaining airflow—both critical in Arizona’s hot climate. The height also influences how well the sail can be tensioned, preventing sagging that reduces shade and creates tripping hazards. The angle of tilt, typically 20°-30° from horizontal, helps direct the sun’s rays away from your seating area, especially during peak hours when the sun is at its highest. For example, tilting the sail about 30° during summer aligns with the sun’s high position, maximizing shade and minimizing heat transfer. This tilt also prevents the fabric from trapping heat underneath while promoting airflow. Adjusting the tilt seasonally—flattening it slightly in winter or sharpening it in summer—ensures consistent protection. Think of the sail as a dynamic shield that works best when its height and angle are fine-tuned to the sun’s seasonal journey, ultimately making your outdoor area more comfortable year-round.
As an affiliate, we earn on qualifying purchases.
Frequently Asked Questions
When is the best time of year to install a shade sail for maximum afternoon shade?
Late spring or early summer is ideal, as the sun is at its highest and most intense in the afternoon. Installing then ensures you get the most relief during peak heat months.How do I determine the best orientation for my specific location?
Use sun path charts or online tools tailored for Arizona’s latitude. These show the sun’s position throughout the year, helping you align your sail for optimal shading during peak hours.What height should I install my shade sail for optimal shade and stability?
Typically, between 8 and 12 feet above ground. This height balances effective shading, airflow, and aesthetic appeal, especially in Arizona’s climate.Can I install a shade sail myself, or should I hire a professional?
DIY is possible if you have the right tools and some handyman skills. For larger or complex setups, hiring a professional ensures safety, durability, and precise orientation.How do I maintain my shade sail to withstand Arizona’s weather?
Regularly check tension, clean the fabric with gentle soap, and inspect anchor points for wear. Trimming nearby branches and replacing damaged fabric prolongs lifespan.As an affiliate, we earn on qualifying purchases.
Conclusion
Getting your shade sail oriented correctly isn’t just about shade — it’s about reclaiming your outdoor space from Arizona’s relentless sun. With a little planning and a few simple adjustments, you can keep cool, protect your furniture, and enjoy your yard all summer long.
Imagine stepping outside into a cool, shaded oasis—no sweat, no glare, just comfort. That’s the power of smart shade sail placement. So, set that angle right, and let your patio become your favorite retreat.
Halloween Picks
halloween
As an affiliate, we earn on qualifying purchases.