TL;DR

Get garden gear delivered free with Prime
- Fast, free delivery on millions of items
- Prime Video, Amazon Music and more included
- Member-only deals all year
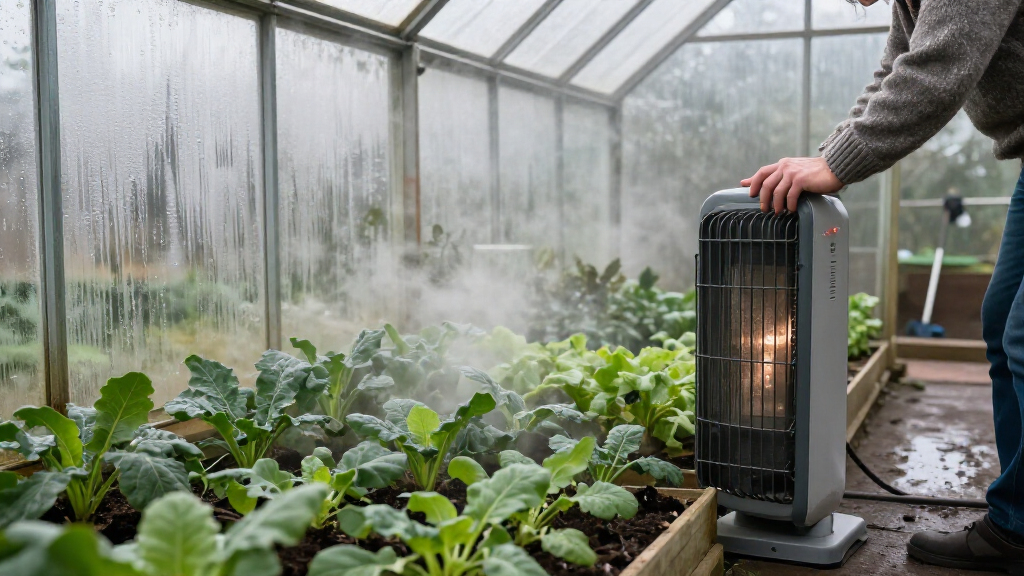
Electric greenhouse heaters convert electricity into heat to protect plants, but heater size, greenhouse drafts, local winter lows, and your temperature target determine whether one can do the job affordably. Seal gaps, heat only to the plants’ minimum safe temperature, and use equipment rated for a damp greenhouse with suitable electrical protection.
In the desert, a sunny afternoon can fool you into thinking your greenhouse is safe for the night. Then the air drops, the glass turns cold, and a row of tender seedlings can suffer before sunrise. Electric greenhouse heaters can help, but the wattage printed on the box only tells part of the story.
This guide explains how to match a heater to your greenhouse, compare fan, radiant, and tubular styles, estimate running costs, and reduce heat loss before buying more power. You’ll also find practical safety advice for a damp growing space, where cords, condensation, and plant debris deserve attention.
Whether you’re protecting citrus in a high-desert cold snap or starting peppers before spring, your goal is simple: keep plants warm enough to stay safe, without heating the whole structure like a living room.
Size an electric greenhouse heater for the structure, local winter lows, and your plants’ minimum safe temperature.
Compare fan, radiant, and tubular heaters by how they warm the space, then follow the maker’s positioning instructions.
Seal drafts, add a thermal screen, and heat only the area your plants need.
Estimate use by multiplying kilowatts by hours, then apply your electricity rate per kWh.
Choose equipment rated for the damp setting, keep connections dry, and ask an electrician about circuit capacity when needed.
Choose a heater that can handle your coldest nights
Electric greenhouse heaters need enough output for your greenhouse’s heat loss and your plants’ minimum safe temperature. Size depends on the structure’s volume, glazing, drafts, local winter lows, and the temperature you want inside. These factors interact: a larger temperature gap between outdoors and your target makes heat escape faster, while leaky glazing or exposed walls increase the amount the heater must replace. A heater that works in a small, sheltered lean-to may struggle in a large greenhouse with loose panels.
Think of your greenhouse like a bucket with a slow leak: the heater pours warmth in while cold air and bare glazing let it drain away. A bigger heater pours faster, but sealing obvious gaps can often save energy more effectively. For example, if a high-desert forecast calls for a sharp overnight freeze, a drafty greenhouse may lose heat much faster than the small one tucked against a house wall. That means two structures with the same floor area can need different heater outputs, and a rating based only on area may mislead.
Before choosing a model, measure the structure and check its insulation and glazing. Then use a sizing guide from a reputable supplier or manufacturer; local winter lows and exposure matter, so a generic recommendation may not fit your site. Allow for heat loss from exposed walls and leaks, and compare the rated output with the maker’s advice for your greenhouse conditions. If the estimate assumes milder weather or better insulation than you actually have, the heater may run continuously without reaching the setpoint. Oversizing also has a tradeoff: it may reach the target quickly, but costs more upfront and can create hot spots if poorly positioned.
Set your target around the crop’s lowest safe temperature, not your own comfort. A heater keeping seedlings just above their threshold has a different job from one maintaining a warm space for tropical plants. That difference can change both the heater you need and the bill you pay. A lower target reduces the temperature gap with outdoors and usually reduces runtime, but it only makes sense if the plants can tolerate it; identify the most sensitive crop in the heated area before setting the thermostat.
Popular right now

iRobot Roomba 105 Combo Robot Vacuum and Mop

Ninja CM401 Specialty Coffee Maker with 10-Cup Carafe and Fold-Away Frother

Samsung 65-Inch The Frame Pro Neo QLED 4K TV (2026) Bundle with Modern Brown Bezel, HDMI Cables, and Home Theater Guide
As an affiliate, we earn on qualifying purchases.
Compare fan, radiant, and tubular heaters by how they warm plants
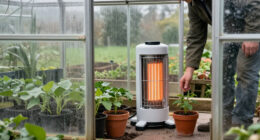
Fan heaters warm and circulate air, radiant heaters warm nearby surfaces and objects, and tubular heaters usually add background warmth in a smaller space. The best fit depends on your greenhouse layout and whether you need broad air warming or a little localized protection. Product names vary, so compare the actual output, controls, protection ratings, and manufacturer instructions. The key tradeoff is where the heat goes: circulating air can make a broad area more even, while directing heat at a bench can use less energy if only that bench needs protection.
| Heater type | How it warms | Good fit |
|---|---|---|
| Fan heater | Pushes heated air around | Spaces where air movement helps spread warmth |
| Radiant heater | Warms nearby objects and surfaces | A particular bench or area needing local warmth |
| Tubular heater | Adds lower-level background heat | Small spaces or gentle frost protection |
Imagine a cold greenhouse with one bench of young seedlings. A fan heater may spread warm air around that area, while a radiant model aimed nearby can warm the bench and pots more directly. A tubular heater may suit a small, sheltered corner where you need modest background protection. In a larger greenhouse, a single heater of any type can leave distant plants colder, so placement and temperature checks at crop level matter as much as the style.
None of these styles automatically suits every greenhouse. Keep hot air and radiant heat away from foliage at close range, and follow the clearance directions for your specific unit. If a fan heater leaves one end of a larger structure chilly, suitable air circulation may help reduce cold spots. Fan movement can improve mixing, but it also adds noise and may stir dust; radiant warmth avoids that airflow but depends more on line of sight and can leave shaded areas cool. Choose according to the area you need to protect, then verify temperatures where the plants actually sit.
Cut heat loss before turning the thermostat higher
Insulation and draft control reduce the heat your heater must replace, which can matter more than choosing a larger unit. Seal obvious gaps, consider a thermal screen or inner insulating layer, and pay attention to heat escaping at night. These steps help a modest heater hold a useful temperature for longer. Their value is greatest when the greenhouse leaks heat quickly; insulation will not create warmth, but it slows the rate at which the heater has to replace it.
For example, a gardener with a small greenhouse in an exposed yard may find that loose door edges and cold glazing make the heater run for long stretches. Fixing a draft and drawing a thermal screen after sunset can reduce the amount of warmth escaping. The exact savings depend on the structure and weather, but the heater’s runtime gives you a practical clue. If runtime drops after the changes while overnight temperatures stay similar, the heater is replacing less lost heat. Keep ventilation needs in mind: sealing drafts should not mean trapping excessive humidity or blocking necessary airflow during the day.
Heat only the space you need. If you’re raising seedlings on one bench, a protected growing area may need less warmth than the whole greenhouse. Use a thermostat to switch the heater around your chosen target, and place a separate minimum–maximum thermometer near the plants so you can compare actual conditions with the thermostat reading. A thermostat near the heater may sense warmer air than the leaves experience, so that comparison can reveal cold corners or poor placement before plants show damage.
Newer controls may offer schedules, remote readings, or app-connected alerts. Those features can help you notice an unexpected temperature drop, but they don’t replace suitable installation or a backup plan. Alerts are useful only if someone can respond, and a schedule that assumes the same weather each night can miss a sudden cold snap. If a cold night could damage valuable plants, check conditions yourself and know what you’ll do if the heater stops.
Estimate running costs with one simple calculation
To estimate electricity use, multiply kilowatts by operating hours; multiply that result by your electricity price per kilowatt-hour to estimate cost. A 1 kW heater running for five hours uses 5 kWh. The thermostat’s cycling, outdoor temperature, greenhouse insulation, and indoor target determine how many hours the heater actually runs. Rated power tells you the draw while the heater is on, not how much it will use over an entire night.
For a rough example, suppose your 1 kW unit runs for five hours overnight and your rate is 30 cents per kWh. That night’s estimated energy cost is $1.50. If it runs only two hours on a mild night, the estimate falls to 60 cents. Your rate may differ, and a real bill can include charges beyond energy use, so check your tariff. The example assumes the heater draws its full rated power while running; a thermostat that cycles it on and off reduces total use in proportion to its actual operating time.
By converting electricity into heat, a resistance heater supplies warmth where you place it, but it still draws power whenever it runs. Keep a simple log of overnight minimum temperatures and runtime. After a cold snap, you can see whether sealing a gap, changing a setpoint, or protecting a smaller area made a difference. Comparing nights with similar outdoor lows is especially helpful, because a mild night can make a change look more effective than it would be during a freeze.
Solar panels can contribute electricity, but greenhouse heat demand often arrives at night or in winter, when generation may be low. Whether solar can meaningfully power a heater depends on system size, storage, grid connection, and the heat required. Check your actual winter use before assuming sunny afternoons will cover cold nights. Storage can bridge the timing gap, but it adds cost and must be sized for both the heater’s draw and the hours of darkness.
Use electricity safely in a damp greenhouse
Use only a heater rated for its greenhouse setting, and follow its installation and clearance instructions. Greenhouses can be damp, so keep plugs and connections dry, away from water, and clear of wet foliage and plant debris. Don’t overload a circuit or assume a household space heater is suitable just because it turns on. Moisture and dust can affect electrical equipment, while a heater’s high draw can exceed what a circuit or extension lead is designed to handle.
A household unit that works in a dry spare room may lack protection for condensation or splashes near a watering bench. Check the manufacturer’s guidance for the location and intended use, including protection ratings. A qualified electrician can advise on circuit capacity and protective devices if you’re unsure whether your setup can support the heater. This check matters because an overloaded or inadequately protected circuit can create hazards even when the heater itself appears to operate normally.
Keep the heater clear of flammable materials and avoid aiming hot airflow or intense radiant heat at leaves. During watering, watch for splashes and pooled water around electrical connections. Follow the maker’s instructions on unattended operation, and inspect the equipment regularly for damage, loose connections, or debris. A clear space around the unit helps prevent heat from building up beside leaves, plastic sheeting, or stored supplies, while regular inspection can catch wear before a cold night requires extended use.
For instance, if your heater sits beside a bench where you water pots each morning, moving it to a dry, stable position may reduce the chance of splashing. Product features and local electrical requirements vary, so check the current specifications for the unit you choose. Safe installation matters as much as its heating output: a powerful heater cannot protect plants reliably if its supply or location is unsuitable.
Set a simple overnight routine for tender plants
A reliable overnight routine pairs a plant-specific temperature target with a working thermostat and a check near the crops. That routine can protect plants without asking you to keep the whole greenhouse warmer than necessary. Different crops have different temperature needs, so check the requirements for the plants you’re growing. The temperature beside the thermostat may differ from the coldest bench, so the crop-level reading tells you whether the chosen setting works in practice.
- Check the forecast and note when the overnight low is expected.
- Set the thermostat to the minimum safe temperature for your crop.
- Check a separate thermometer near the plants to see whether the thermostat reflects their conditions.
- Inspect the space for drafts, water near connections, and anything too close to the heater.
- Review the minimum and maximum readings the next morning and adjust your setup if needed.
For a desert gardener protecting potted citrus, that might mean setting the heater only high enough to stay above the crop’s safe threshold during a forecast freeze. A propagation bench may need different conditions from a row of established plants. Check each crop’s needs instead of assuming one comfortable setting suits everything. Grouping plants with similar temperature needs can make one target practical; otherwise, a single heated zone may be too warm for some plants and too cool for others.
A heater can help maintain a chosen temperature if it has enough capacity and keeps working, but it cannot guarantee frost protection through severe cold, a power cut, or equipment failure. If the plants are valuable, consider how you’ll notice a failure and what backup warmth or relocation is practical. The next morning’s temperature record can help you spot trouble before the next cold snap. A low reading despite a long runtime can point to insufficient capacity or excessive heat loss; a reading that matches the target in one spot but not another suggests a placement or circulation problem.
Frequently Asked Questions
What size electric heater do I need for my greenhouse?
It depends on greenhouse volume, glazing, drafts, local winter temperatures, and the minimum temperature you need to maintain. Use a sizing guide from a reputable manufacturer or supplier, and account for exposed or poorly insulated areas.
How much does an electric greenhouse heater cost to run?
Multiply the heater’s kilowatts by the hours it runs, then multiply by your electricity rate per kWh. A 1 kW heater running for five hours uses 5 kWh; a thermostat, insulation, weather, and setpoint affect its actual runtime.
Can I leave a greenhouse heater running overnight?
Follow the manufacturer’s instructions for unattended operation and thermostat use, and inspect the heater and connections regularly. Use a unit rated for the greenhouse setting, keep it away from water and flammable materials, and have a plan for a power or equipment failure.
Which works best: a fan, radiant, or tubular heater?
Fan heaters warm and circulate air, radiant heaters warm nearby objects and surfaces, and tubular heaters generally provide background warmth in smaller spaces. Choose based on your greenhouse layout and plant needs, then follow the product’s placement and clearance directions.
Will an electric heater prevent frost damage?
It can help keep temperatures above a chosen threshold if it has enough capacity and continues working. Severe cold, a power cut, or equipment failure can still expose plants to frost, so check overnight temperatures and prepare a backup plan for valuable crops.
Can I use a household space heater in a greenhouse?
Only use it if the manufacturer says it is suitable for that damp environment. A heater intended for a dry room may not have the required protection for greenhouse conditions; check the specifications and electrical requirements first.
Conclusion
Match the heater to your coldest nights and your plants’ needs, then cut heat loss before raising the thermostat. Check the temperature near the leaves, not just at the heater, and keep electrical connections out of the damp.
A bright desert afternoon may fade fast after sunset. Give tender plants a measured pocket of warmth, and let the heater work with your greenhouse instead of against the night.