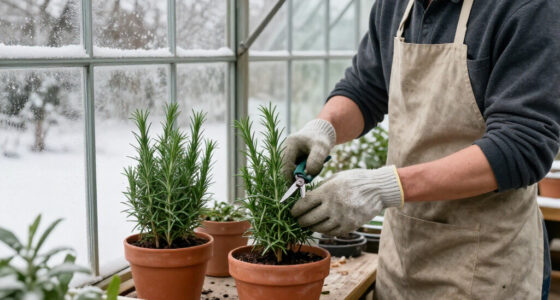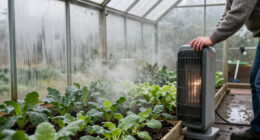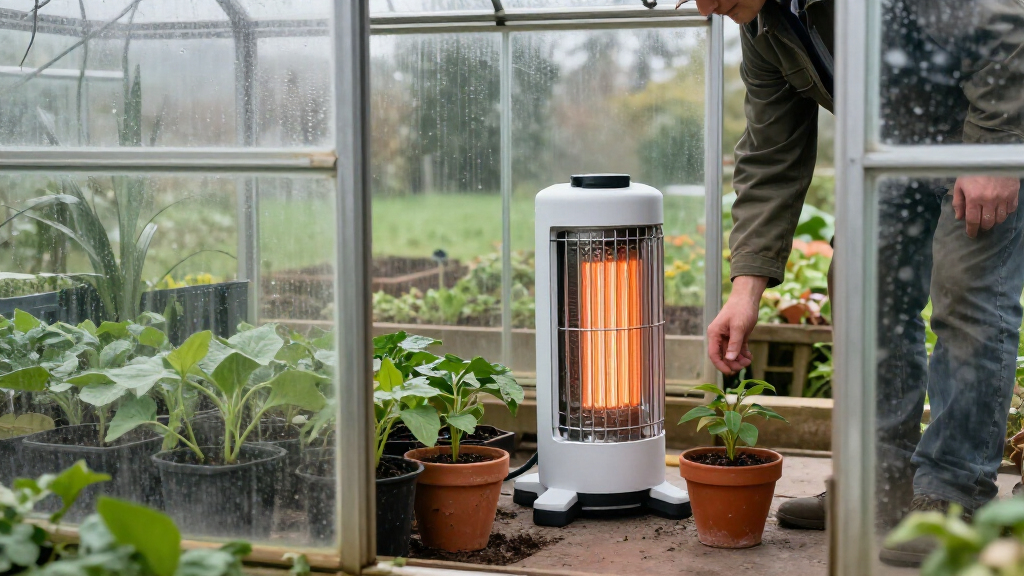

Choose and set up an electric greenhouse heater that can keep your plants within their required temperature range. This guide is for greenhouse owners with basic measuring and setup skills; allow 1–3 hours for sizing, positioning, and setup, then monitor the greenhouse overnight to check performance.

Get garden gear delivered free with Prime
- Fast, free delivery on millions of items
- Prime Video, Amazon Music and more included
- Member-only deals all year

SmterCon Greenhouse Heater with Digital Thermostat
- ✔ Power: 1500W
- ✔ Heating area: Up to 120 sq. ft.
- ✔ Thermostat: Digital, automatic temperature control
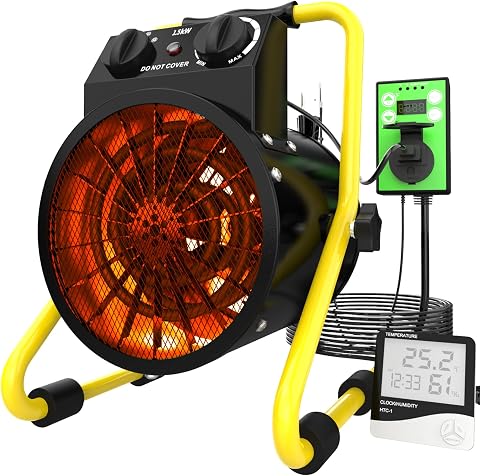
Buyplus Greenhouse Heater with Digital Thermostat, 1500W, Black
- ✔ Power: 1500W heating; 25W fan-only
- ✔ Coverage: Up to 215 sq. ft.
- ✔ Temperature range: 40°F–108°F (5°C–42°C)

VEVOR Greenhouse Heater, 1500W Electric Space Heater with Thermostat, Fan & High Heat Modes
- ✔ Power: 1500W
- ✔ Modes: Heating and fan
- ✔ Temperature settings: Two
Difficulty: Beginner | Time: 1–3 hours, plus temperature monitoring overnight
What You’ll Need
Tools & Materials:
- Tape measure
- Thermometer with minimum and maximum readings, or a greenhouse thermostat
- Electric greenhouse heater with thermostat and suitable safety rating
- Manufacturer’s installation and safety instructions
- Outdoor-rated extension lead only if the heater manufacturer permits one
Knowledge:
- Basic familiarity with the greenhouse electrical supply
- The minimum temperature required by the plants being protected
Check the heater’s instructions and local electrical requirements before setup. Greenhouses are damp environments: use equipment and connections rated for the location, and have a qualified electrician install a permanent outlet or circuit if needed. Do not use a household extension lead or a heater that is not approved for greenhouse use.
SmterCon Greenhouse Heater with Digital Thermostat
The SmterCon is our best overall choice for growers who prioritize temperature consistency. Its digital thermostat automatically controls heating to maintain a set temperature, which gives it a clear advantage over the VEVOR’s listed two temperature settings and the Buyplus’s adjustable thermostat, for which automatic operation is not specified. That difference matters when we want the heater to respond to changing conditions instead of relying on frequent manual adjustments.Its stated coverage is up to 120 sq. ft., the smallest explicit area among the products that provide a coverage figure; Buyplus lists up to 215 square feet. We should therefore treat SmterCon as a fit for a smaller greenhouse or a defined zone, rather than assume it will handle a larger structure. Adjustable ventilation is a useful addition for circulating air, while overheat protection addresses one basic safety concern. The tradeoff is that the available description gives less detail about heating and fan modes than VEVOR and Buyplus. Choose it for thermostat-led control in a modest space; skip it if broad stated coverage is your priority.
Pros:
- Digital thermostat automatically controls heat to maintain a set temperature.
- Lists coverage of up to 120 sq. ft.
- Adjustable ventilation supports air circulation.
- Includes overheat protection.
Cons:
- Its stated coverage is lower than Buyplus’s listed 215 sq. ft.
- The supplied details do not specify a fan-only mode or a temperature range.
Best for: Growers with a greenhouse or growing zone of up to 120 sq. ft. who want digital automatic temperature control.
Not ideal for: Buyers heating a larger greenhouse who want a listed coverage figure above 120 sq. ft. or clearly specified fan-only operation.
Bottom line: Choose the SmterCon when automatic digital temperature control matters more than the widest stated coverage.
“Choose the SmterCon when automatic digital temperature control matters more than the widest stated coverage.”
Buyplus Greenhouse Heater with Digital Thermostat, 1500W, Black
For growers comparing the listed area each heater can serve, Buyplus makes the strongest coverage claim: up to 215 square feet. That gives it the broadest stated reach in this lineup, ahead of the SmterCon’s 120 square feet and VEVOR, whose description does not provide a coverage figure. As with any heater, the actual result will depend on greenhouse insulation, outside conditions, and air leakage, so we should use the figure as a guide rather than a guarantee.Buyplus also spans a 40°F–108°F adjustable temperature range and offers a 25W fan-only mode for air movement when heat is not needed. Its adjustable angle and portable handle add placement flexibility. Compared with SmterCon, however, Buyplus’s thermostat is described as adjustable without an explicit claim that it automatically maintains the setpoint. And while its 1500W heating mode matches the others, the product information does not specify energy efficiency. This is the more compelling option when listed area and the fan-only function lead our decision; a small greenhouse where automatic thermostat behavior is paramount may be better served by SmterCon.
Pros:
- Lists coverage of up to 215 sq. ft., the largest stated area here.
- Adjustable thermostat covers 40°F to 108°F.
- 25W fan-only mode supports air circulation without heating.
- Portable handle, adjustable angle, and overheat protection are included.
Cons:
- Automatic thermostat control is not specified as it is for SmterCon.
- Energy efficiency is not specified in the product information.
- Only heating and fan-only modes are listed.
Best for: Growers seeking a 1500W heater with the broadest listed area, adjustable temperature, and separate fan-only operation.
Not ideal for: Buyers who need explicitly stated automatic temperature maintenance or documented energy-efficiency information.
Bottom line: Buyplus is the coverage-led pick when its 215 sq. ft. claim and fan-only mode fit our greenhouse needs.
“Buyplus is the coverage-led pick when its 215 sq. ft. claim and fan-only mode fit our greenhouse needs.”
VEVOR Greenhouse Heater, 1500W Electric Space Heater with Thermostat, Fan & High Heat Modes
VEVOR stands out for flexible placement and simple year-round use. Its 25° adjustable angle lets us direct warmth toward a particular bench or work area, while its separate fan mode can circulate air without heating. That combination distinguishes it from SmterCon, whose supplied description focuses on automatic thermostat control, and complements Buyplus’s fan-only mode and broader stated coverage.VEVOR lists two temperature settings and a 40°F–108°F thermostat range, with a 1500W heating output. The product description also specifies IPX4 protection and overheat shutoff, plus a portable handle and stable base. These are useful practical details for a floor-mounted heater, but they do not replace following placement instructions in a damp greenhouse. The main limitation in this comparison is the absence of a stated heating-area figure; unlike SmterCon and Buyplus, we cannot match its published coverage to a greenhouse size. Its two settings may also offer less precise control than a digital thermostat designed to maintain a target temperature. Consider it when airflow and aiming matter most; look elsewhere when coverage certainty or automatic digital control is essential.
Pros:
- Provides 1500W heating and a separate fan mode.
- 25° adjustable angle helps direct warmth toward a chosen area.
- Thermostat range is listed as 40°F–108°F.
- Includes IPX4 and overheat protection, plus a carrying handle.
Cons:
- No heating-area coverage figure is provided.
- Two temperature settings offer less specified control than SmterCon’s digital automatic thermostat.
- The listed angle adjustment is narrower than Buyplus’s 0°–45° range.
Best for: Growers who want an adjustable, portable heater with dedicated fan mode and directional warmth for a greenhouse zone.
Not ideal for: Buyers who need a stated coverage area or the clearly described automatic digital thermostat offered by SmterCon.
Bottom line: VEVOR is a practical fit when directed warmth and fan circulation matter more than a published coverage figure.
“VEVOR is a practical fit when directed warmth and fan circulation matter more than a published coverage figure.”
As an Amazon Associate we earn from qualifying purchases.
Before You Start
Write down the lowest temperature your plants can tolerate and the temperature you want to maintain. These values may differ: tender seedlings often need more warmth than hardy plants. Check for drafts, gaps, and wet floors, since poor insulation and moisture can reduce performance or create hazards. Never cover a heater or place it where water can splash onto it.
Step-by-Step Instructions
Step 1: Measure the greenhouse
Measure the inside length, width, and height. Multiply length by width to get floor area, and record the dimensions for the heater’s sizing guidance. Note the glazing type, large gaps, and whether the greenhouse shares heat with another space.
Tip: Use the heater maker’s sizing chart or a reputable heat-loss calculator. Area alone does not account for cold climates, glazing, wind exposure, or the temperature difference you need to maintain.
Check: You have the greenhouse dimensions, floor area, glazing details, and target minimum temperature written down.
Step 2: Choose a suitable heater
Compare greenhouse-rated electric heaters using the manufacturer’s capacity guidance for your space and local winter conditions. Choose a model with a thermostat, stable mounting or standing instructions, and protection suited to a damp environment. Confirm that the electrical circuit can support its wattage; check the label and ask an electrician if you are unsure.
Tip: A heater that is too small may run continuously without holding the target temperature. A larger model still needs a thermostat and safe electrical supply.
Check: The heater is approved for the intended location, is sized for the greenhouse, and can be safely powered by the available circuit.
Step 3: Reduce heat loss
Close doors and vents for the cold-weather setup, repair obvious gaps, and add suitable insulation where it will not block required ventilation or trap moisture around electrical equipment. Keep vents available for use when temperatures rise or plants need airflow.
Tip: Do not seal the greenhouse permanently. Plants and equipment may need ventilation, and condensation can build up in a closed space.
Check: Doors close properly, major drafts are reduced, and vents remain accessible.
Step 4: Position the heater
Place or mount the heater exactly as its instructions specify. Keep it clear of plants, plastic sheeting, benches, stored materials, and walkways by the required distances. Direct airflow into open space so heat can circulate without blowing continuously onto foliage.
Tip: Keep the heater off wet ground and away from irrigation spray. Do not use a portable heater where it can tip over or be knocked by a door or person.
Check: The heater is stable, unobstructed, and positioned at the clearances listed by its manufacturer.
Step 5: Connect the power safely
Use a properly installed, grounded outlet and any protective device required by local rules and the heater instructions. Keep plugs and connections dry, elevated, and protected from damage. If a permanent outdoor supply is needed, arrange installation by a qualified electrician rather than improvising a connection.
Tip: Do not daisy-chain extension leads, use damaged cables, or run a lead through a door where it can be crushed. Disconnect power before moving or cleaning the heater.
Check: The cable is undamaged, secured away from water and foot traffic, and the heater is connected according to its instructions.
Step 6: Set the thermostat
Set the thermostat to the minimum temperature your plants require, using the manufacturer’s control instructions. Place a separate thermometer at plant height away from the heater’s direct airflow and cold glazing to measure conditions where the plants are.
Tip: Avoid setting the thermostat higher than needed. A higher setting can increase electricity use without improving plant protection.
Check: The thermostat is set to the chosen target, and the thermometer can measure the temperature around the plants.
Step 7: Run and monitor the heater
Switch the heater on and check that it starts and stops as the greenhouse warms to the set point. Record the temperature before bedtime and check the minimum reading the following morning. Repeat during a colder night if possible, adjusting the thermostat or addressing heat loss as needed.
Tip: Follow the product instructions for first use and keep the heater attended during any required initial check. Stop using it if you notice a burning smell, unusual noise, damaged cable, or repeated circuit trips.
Check: The heater cycles as expected, and the recorded overnight minimum stays within the range your plants need.
Common Mistakes to Avoid
- Choosing a heater based only on floor area. — Use the manufacturer’s sizing guidance and account for glazing, drafts, climate, and the target temperature.
- Placing the thermostat sensor beside the heater. — Measure at plant height, away from direct airflow and cold glass, so the reading reflects the plants’ conditions.
- Using an indoor heater or an unsuitable extension lead in a damp greenhouse. — Use greenhouse-rated equipment and an electrical supply that meets the product instructions and local requirements.
- Blocking airflow or placing flammable materials too close. — Follow the listed clearance distances and keep the heater’s intake and outlet unobstructed.
Troubleshooting
Problem: The greenhouse stays below the thermostat setting.
Solution: Check the heater’s capacity, confirm doors are shut and drafts reduced, and verify the thermometer location. If the circuit or heater cannot safely provide the required output, consult an electrician or choose a properly sized model.
Problem: The heater runs continuously.
Solution: Check for open vents, gaps, or a target setting beyond the heater’s capacity. Compare the plant-level thermometer with the thermostat reading and correct the sensor position if needed.
Problem: The temperature varies widely near plants.
Solution: Move the thermometer to a representative plant-level position, improve air circulation without directing hot air onto foliage, and check whether cold areas need draft reduction.
Problem: The circuit trips or the heater smells hot or burnt.
Solution: Switch off and unplug the heater if safe to do so. Do not reset the circuit repeatedly or continue using equipment with a burning smell; have the heater and circuit checked by a qualified professional.
What Success Looks Like
The heater remains stable and unobstructed, its thermostat switches it on and off as expected, and a separate thermometer shows that the overnight minimum stays above the lowest temperature required by the plants. The cable and connection remain dry and undamaged, with no unusual smell, noise, or circuit trips.
Next Steps
Check the minimum temperature each morning during cold spells and after changing insulation, vents, or heater settings. Clear dust and debris according to the manufacturer’s maintenance instructions, and inspect the cable and plug before each heating season. Reassess the setup if you add plants with different temperature needs or expand the greenhouse.
Frequently Asked Questions
How powerful should an electric greenhouse heater be?
Use the heater maker’s sizing guidance for your greenhouse dimensions, glazing, local winter conditions, and target temperature. A floor-area estimate alone may not account for heat loss.
Can I use a household space heater in a greenhouse?
Use a heater only if its manufacturer approves it for the damp conditions and placement in your greenhouse. Check the product label and instructions; a heater intended only for dry indoor rooms may be unsuitable.
Where should the thermostat be placed?
Follow the manufacturer’s sensor instructions. For a separate thermometer, choose a representative spot at plant height, away from direct heater airflow, cold glazing, and direct sun.
Should I leave the heater on overnight?
Follow the heater instructions and local electrical safety requirements. Use a suitable thermostat and electrical supply, keep the heater clear of combustibles, and monitor overnight temperatures to confirm the setup works.
Why is the greenhouse still cold even though the heater is running?
The heater may be undersized, heat may escape through gaps or open vents, or the thermometer may be measuring a colder area. Check the sizing, reduce drafts, and compare readings at plant height.