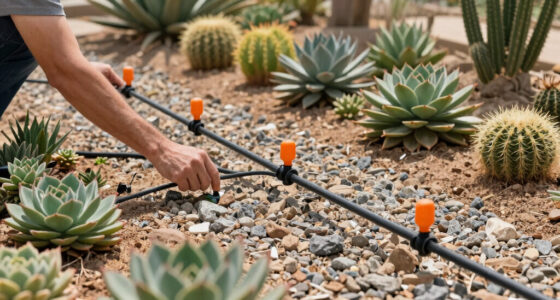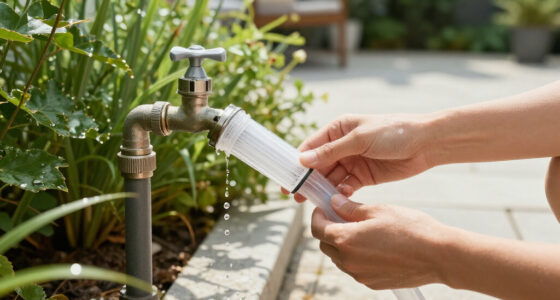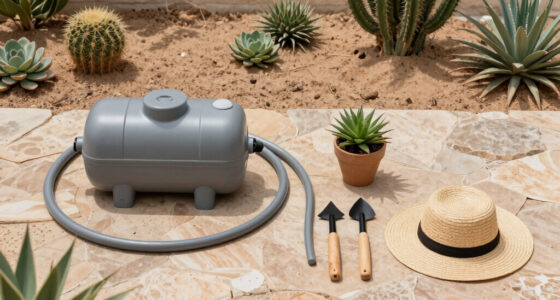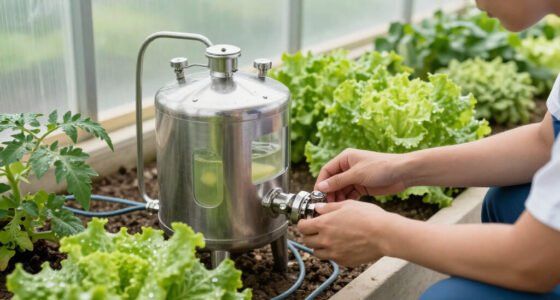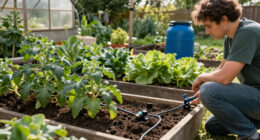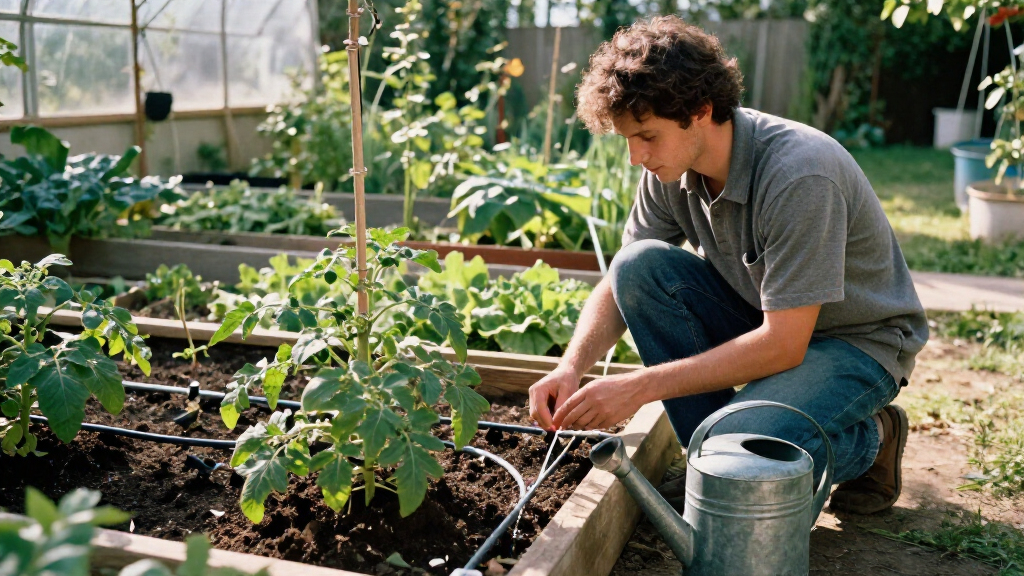

Install a water-wise drip irrigation kit to deliver water slowly near plant roots and reduce evaporation and runoff. This guide is for home gardeners setting up a new system in a garden bed, raised bed, or container area. You will plan the tubing route, assemble the kit, test each outlet, and adjust watering to your plants. Allow 2–4 hours, including a test run; the work is suitable for beginners who can use basic garden tools.

Get garden gear delivered free with Prime
- Fast, free delivery on millions of items
- Prime Video, Amazon Music and more included
- Member-only deals all year
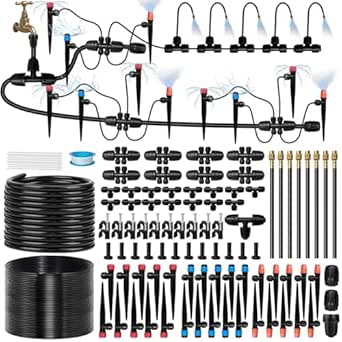
230ft Drip Irrigation System with Adjustable Copper Nozzles and Emitters
- ✔ Total tubing: 230 ft
- ✔ Main line: 33 ft, 1/2 inch
- ✔ Drip line: 197 ft, 1/4 inch

AWUREYIT 240FT Drip Irrigation System Kit with 1/2" Main Tubing and 1/4" Distribution Hoses
- ✔ Total hose length: 240 ft
- ✔ Main tubing: 40 ft, 1/2 inch
- ✔ Distribution hose: 200 ft, 1/4 inch

Kafuzi 230-Foot Quick-Connect Drip Irrigation Kit
- ✔ Total tubing: 230 ft
- ✔ Main tubing: 33 ft, 1/2 inch
- ✔ Distribution tubing: 197 ft, 1/4 inch
Difficulty: Beginner | Time: 2–4 hours
What You’ll Need
Tools & Materials:
- Drip irrigation kit with tubing, connectors, emitters, filter, and pressure regulator
- Tape measure and garden stakes or flags
- Scissors or tubing cutter
- Hole punch, if the kit requires one
- Timer, optional
- Mulch, optional
Knowledge:
- Basic familiarity with the garden layout and water source
- Ability to turn off the outdoor tap and cut tubing
Check the kit label for its pressure rating, tubing size, and maximum recommended line length. Use a kit compatible with your tap or hose connection. Make a rough list of plant locations and group plants with similar water needs on the same watering zone. Keep the manual nearby because connectors and emitter installation can vary by kit.
230ft Drip Irrigation System with Adjustable Copper Nozzles and Emitters
This kit earns our top spot because its four emitter styles make it easier to adapt watering to a mixed garden. Vortex and stream emitters offer different delivery patterns, misting nozzles can suit plants or spaces that call for finer spray, and the bendable copper nozzles let us aim water around a bed or toward an individual pot. That adjustability is more useful for water-wise setup than tubing length alone: we can tailor where and how water lands instead of treating every plant the same.Its 230 feet of tubing includes 33 feet of 1/2-inch main line and 197 feet of narrower 1/4-inch line. Push-to-connect fittings support tool-free assembly, and the larger main line is intended to support multiple zones. Compared with AWUREYIT, it gives up 10 feet of total tubing but adds copper heads and a fourth nozzle style. Compared with Kafuzi, it emphasizes pattern choice and aim more than individual flow control. The tradeoff is planning: 38 nozzles and assorted connectors can take careful placement, and the fine lines may clog if water is not filtered. This is our best all-round fit for varied planting, provided we are willing to lay it out thoughtfully.
Pros:
- Four nozzle styles support different watering patterns.
- Bendable copper heads provide directional adjustment.
- Push-to-connect fittings support tool-free assembly.
- A 1/2-inch main line and connectors support customizable zones.
Cons:
- The many emitters and connectors require layout planning.
- Narrow 1/4-inch lines may clog without filtered water.
Best for: Gardeners combining raised beds, greenhouse plants, and containers that need different spray patterns or nozzle directions.
Not ideal for: Buyers who want a simple, minimal-part layout or cannot filter and periodically check narrow distribution tubing.
Bottom line: We recommend this as the most adaptable option for mixed gardens where aiming and varying the spray pattern matter more than having the longest tubing run.
“We recommend this as the most adaptable option for mixed gardens where aiming and varying the spray pattern matter more than having the longest tubing run.”
AWUREYIT 240FT Drip Irrigation System Kit with 1/2" Main Tubing and 1/4" Distribution Hoses
For a garden where coverage and the option to divide the layout are priorities, AWUREYIT supplies the most tubing in this group: 240 feet total, including 40 feet of 1/2-inch main tubing and 200 feet of 1/4-inch distribution hose. That extra main-line length compared with the other two kits may help when beds or growing areas are spread out. The description also identifies the setup as suitable for large-scale or dual-zone arrangements, making this a practical choice for a greenhouse beside a patio or a garden with separate beds.The 136-piece kit uses quick-connect fittings and provides adjustable stream, vortex, and misting emitters. Its stated UV-resistant and corrosion-proof material properties speak to outdoor use, though the available details do not establish a specific service life. Compared with our top pick, AWUREYIT has more tubing but does not list bendable copper nozzles; its three emitter types offer less directional variety. Compared with Kafuzi, it gives more total line and explicitly describes the main-line length, while Kafuzi calls out individual flow adjustment and a maximum sprinkler capacity. AWUREYIT’s large parts count can make assembly organization important, and a garden timer is not included in the listed components. We place it second because its reach is compelling, but coverage alone does not replace emitter-by-emitter tailoring.
Pros:
- 240 feet of tubing is the most in this comparison.
- 40 feet of 1/2-inch main tubing supports a longer backbone.
- Adjustable stream, vortex, and misting emitters add pattern choice.
- Listed materials are UV-resistant and corrosion-proof.
Cons:
- The 136-piece set can take careful sorting and assembly.
- A garden timer must be obtained separately for automated scheduling.
- It does not list the copper nozzles or directional control of the top pick.
Best for: Gardeners planning a longer run or a divided setup across multiple beds, a greenhouse, or a patio garden.
Not ideal for: Buyers who want copper directional heads, a small straightforward kit, or included timer-based automation.
Bottom line: We would choose AWUREYIT when a larger layout needs more tubing and split-zone flexibility, accepting a substantial parts count and no included timer.
“We would choose AWUREYIT when a larger layout needs more tubing and split-zone flexibility, accepting a substantial parts count and no included timer.”
Kafuzi 230-Foot Quick-Connect Drip Irrigation Kit
Kafuzi is the most appealing of the three when the decision point is adjusting flow at individual sprinklers. Its description says each sprinkler’s water flow can be adjusted and lists capacity for up to 32 sprinklers, giving the layout room to expand around beds, lawn edges, or greenhouse rows. That stated capacity offers a useful planning reference, although actual performance depends on the water supply and layout; the kit also specifies a maximum pressure of 50 psi, which buyers should compare with their source.The 230-foot total is split into 33 feet of 1/2-inch tubing and 197 feet of 1/4-inch tubing, matching the broad line breakdown of our top-ranked kit. Both use quick-connect fittings, but the copper-nozzle system offers more emitter styles and directional aiming. AWUREYIT provides 10 extra feet overall and 7 extra feet of main tubing, while Kafuzi distinguishes itself with the individual flow-control claim. Kafuzi is made of plastic, a simpler material specification than AWUREYIT’s UV-resistant and corrosion-proof claims. It may suit gardeners who want a flexible, adjustable sprinkler layout, but buyers needing a clearly described range of specialty emitters or higher pressure headroom should compare the other kits first.
Pros:
- Individual sprinkler flow can be adjusted.
- Stated capacity is up to 32 sprinklers.
- Includes both 1/2-inch and 1/4-inch tubing.
- Quick-connect fittings support a flexible layout.
Cons:
- Maximum stated pressure is 50 psi.
- Plastic is the listed material, without the durability claims given for AWUREYIT.
- Only three adjustable sprinklers are specifically listed as included.
Best for: Gardeners who want to adjust water flow at individual sprinklers across raised beds, lawns, or greenhouse areas.
Not ideal for: Buyers with a source above the stated 50 psi maximum or those prioritizing copper nozzles and detailed emitter variety.
Bottom line: Kafuzi is a sensible fit when individual flow adjustment matters most, as long as its pressure ceiling and plastic construction fit the installation.
“Kafuzi is a sensible fit when individual flow adjustment matters most, as long as its pressure ceiling and plastic construction fit the installation.”
As an Amazon Associate we earn from qualifying purchases.
Before You Start
Check local watering restrictions and the outdoor tap for leaks. Drip systems need clean water and controlled pressure; fit the filter and pressure regulator in the order shown by the kit maker. Do not connect unregulated high-pressure water unless the kit specifically allows it. Keep tubing accessible for testing before covering it with mulch.
Plan to water early in the morning when practical. Drip irrigation reduces water loss, but it does not eliminate the need to check soil moisture or adjust for rain, heat, and plant growth.
Step-by-Step Instructions
Step 1: Map plants and measure the route
Sketch the garden bed, mark each plant, and measure the path from the tap to the plants. Note where a main line can run without crossing walkways or getting in the way of digging. Group plants with similar watering needs together, and identify any plants that need separate control.
Tip: Check the kit’s maximum line length and emitter capacity. A line that exceeds the limits may deliver less water near its far end.
Check: You have a route, a plant list, and a rough estimate of tubing and emitter quantities.
Step 2: Lay out the kit parts
Place the tubing, connectors, filter, regulator, end caps, and emitters beside the planned route. Match the parts to the diagram in the kit instructions. Check that the tubing reaches the farthest plant with some extra length for connections and repositioning.
Tip: Do not cut the tubing yet. Confirm the route and part compatibility first; some kits use different connectors for the main line and smaller branch tubing.
Check: Every section of the route has a suitable tubing size and the needed connection parts.
Step 3: Connect the filter and pressure regulator
Turn off the tap. Attach the kit’s backflow preventer if supplied or required locally, then connect the filter and pressure regulator in the order specified by the manufacturer. Attach the system to the tap or hose connection, keeping threaded fittings straight as you tighten them.
Tip: Avoid overtightening plastic threads, which can crack or strip. If the connection leaks, turn off the water and reseat the fitting rather than forcing it tighter.
Check: The components are connected in the specified order and sit firmly without cross-threading.
Step 4: Run and secure the main tubing
Uncoil the main tubing and let it warm in the sun if it is stiff. Lay it along the route from the tap toward the plants. Cut it with scissors or a tubing cutter only after confirming the full path, then connect the cut sections with the kit fittings and secure the line with stakes.
Tip: Keep bends broad and avoid sharp kinks. Leave room around plant stems so the tubing can be adjusted as plants grow.
Check: The main line reaches the planned area, stays in place, and has no pinched sections.
Step 5: Add branches and emitters
Connect branch tubing from the main line to plant rows or individual plants as the kit design allows. Use the supplied hole punch for punched-in emitters; do not make holes with a knife or nail. Place an emitter near each plant’s root zone, not against the stem. For larger plants, install the number of emitters recommended by the kit or plant guidance.
Tip: Put emitters where water can soak into the root area. On sloped ground, secure branch lines and place emitters so water does not run downhill away from roots.
Check: Each plant or row has an outlet positioned to wet its root area.
Step 6: Close the line ends and flush the system
Fit end caps or flush valves to every open tubing end. Before installing any flush cap permanently, follow the kit directions to flush debris from the lines. If the instructions call for flushing with an end open, briefly run the water, then turn it off and close the line securely.
Tip: Debris left in the tubing can clog small emitters. Keep loose tubing ends clean while assembling the system.
Check: All line ends are closed after flushing, and no open connection is left spraying water.
Step 7: Test for leaks and even flow
Turn on the tap slowly and run the system. Walk the entire route and inspect the tap fittings, connectors, punched holes, and end caps. Check that each emitter releases water and that the farthest plants receive flow. Turn off the tap before reseating or replacing any leaking part.
Tip: A small amount of water at each emitter is normal. Look for disconnected tubing, steady sprays from a hole, or dry outlets rather than expecting a strong stream.
Check: Connections stay dry, emitters produce water, and no plant location is left without an outlet.
Step 8: Set a starting watering schedule
Run the system for a short initial period, then check the soil near several emitters, including the farthest one. Extend the run gradually until moisture reaches the root zone without creating puddles or runoff. Record the duration and check soil again after the next watering before setting a timer.
Tip: Watering time depends on emitter flow, soil, plant size, and weather. Sandy soil drains quickly; clay soil absorbs water slowly and may need shorter runs with pauses.
Check: Soil is moist where roots grow, without standing water or water flowing out of the bed.
Step 9: Secure the layout and add mulch
After the test passes, stake loose tubing and reposition emitters if needed. Add a layer of mulch over the soil if appropriate for the plants, leaving a small gap around stems. Keep connectors and end caps reachable for inspection and seasonal maintenance.
Tip: Do not bury emitters so deeply that you cannot see or clean them. Check the line after weeding or digging nearby.
Check: Tubing stays in place, outlets remain accessible, and mulch does not cover plant crowns or stems.
Common Mistakes to Avoid
- Using a line that is longer than the kit supports. — Check the manufacturer’s maximum length and flow guidance before routing tubing; split the area into zones if needed.
- Putting emitters too far from roots or directly against stems. — Place outlets near the active root zone and move them outward as plants grow.
- Skipping the filter or pressure regulator. — Install both when specified by the kit so debris and excess pressure do not damage or clog the system.
- Setting a timer without checking soil moisture. — Use a short starting schedule, inspect soil at multiple points, and adjust for weather and plant needs.
Troubleshooting
Problem: One emitter is dry or has weak flow.
Solution: Turn off the tap, check for a kink or loose branch connection, and clean or replace the emitter according to the kit instructions. Flush the line if debris may have entered.
Problem: Water sprays from a connector or punched hole.
Solution: Turn off the tap, push the tubing fully into the fitting, or replace a damaged connector. If a punched hole is misplaced or too large, cut that tubing section and reconnect it with a fresh fitting.
Problem: The far end receives less water than the near end.
Solution: Check for kinks, clogged emitters, or a line length beyond the kit’s limit. Shorten the run, use a larger compatible main line, or divide the area into separate zones.
Problem: The soil is soggy or water runs off.
Solution: Reduce the run time and check whether the outlet is aimed at the root zone. On slow-draining soil or slopes, use shorter watering cycles with pauses and reassess moisture.
What Success Looks Like
The completed system has a stable route from the water source to all planned plants. The filter and regulator are installed as directed, line ends are closed, and emitters wet the root zones without leaks, persistent puddles, or runoff. Check at least one near and one far outlet during a run. After watering, confirm that moisture reaches the roots and adjust the schedule until the soil is damp rather than saturated.
Next Steps
Check the system weekly during the growing season for clogged emitters, leaks, shifted tubing, and dry patches. Recheck watering time after heavy rain, heat waves, planting, or major growth. Flush and clean the filter as directed by the maker. Before freezing weather, drain or store components according to the kit instructions. Keep a note of the schedule that works for each zone.
Frequently Asked Questions
How long should I run a drip irrigation kit?
There is no single run time for every garden. Start with a short run, check moisture near the roots at both near and far emitters, then adjust in small increments. Soil texture, emitter flow, plant size, and weather all affect the result.
Do I need one emitter for every plant?
Small plants may need one emitter, while larger or thirstier plants may need more than one. Follow the kit’s flow guidance and check whether water reaches the full root area; add outlets as plants grow if needed.
Can drip tubing go under mulch?
Yes, tubing can usually sit under mulch, which helps limit evaporation. Keep emitters and connections accessible for inspection, and leave mulch clear of stems and plant crowns.
Should I use a timer?
A timer can make watering more consistent once you know a suitable run time. First test the system manually and adjust the schedule based on soil moisture and local watering rules.
How often should I clean the filter?
Use the kit maker’s cleaning interval and inspect the filter more often if flow drops or the water contains sediment. Turn off the tap before opening or cleaning the filter.